 |
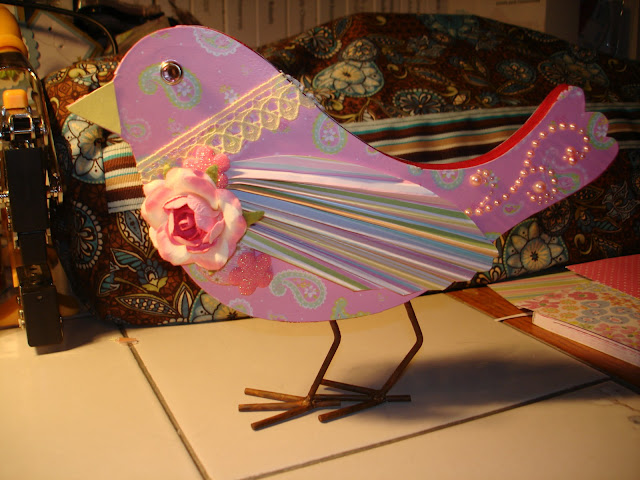
| I used a wooden bird from Michaels and Baby Girl paper from Paper Boutique. |
These are the two main papers I chose to use. For quick and easy coverage I used my RV19 Copic Marker to color the edge of the bird. It works great and it's much quicker than using paint!
I put the paper right side down and laid the bird on the edge of the table with it's legs off the edge so it would lay flat with the side I wanted to cover face down. I traced around the bird and cut it out.
After tracing both sides I glued the paper to the bird using Mod Podge and painted a layer on top of the paper and also on the sides "painted" with the marker.
While the Mod Podge dried I cut out two wings. For one wing I turned the pattern over so it would be a mirror image to the first wing. I then used my score board to score the wing every 1/4 inch following the direction of the 4 1/2" arrow in the picture.
Once the bird was dry I used hot glue to attach the wing. I just pressed the folds the way I wanted them and pressed the wing to the bird for a few seconds.
After the wings I decorated the bird the way I wanted it!
As you can see, by using different paper and decorations you can make each side look different which is great for displaying. If you get tired of one look you can just turn it the other way for a whole new look!


Too cute Laura!!
ReplyDeleteLucy
http://love2createitall.blogspot.com
Wow, that is amazing, I just love how the bird turned out, it is so unique on both sides! I am a new follower and am looking forward to more of your creations.
ReplyDeletewww.scrappindhilly.blogspot.com
Really really cute!
ReplyDeletewww.creativeramblings345.blogspot.com
Thanks everyone! I'm really going to try to post AT LEAST one new creation each week, if not more. : )
ReplyDeleteCouldn't post this on your newest Bird creations so I will do it here. I love the birds. Awesome job as usual Laura.
ReplyDeletehttp://anonymouscricuter.blogspot.com/
Thanks Tammy!
ReplyDeleteSo cute. How did you do the legs?
ReplyDelete